Understanding Tevo Tarantula’s Cooling Needs
The Tevo Tarantula is a popular and affordable 3D printer that provides a great entry point into the world of additive manufacturing. However, like any 3D printer, it is susceptible to issues related to heat management. Effective cooling is paramount for achieving high-quality prints, as it directly influences the dimensional accuracy, structural integrity, and overall finish of printed objects. Understanding the cooling needs of your Tevo Tarantula is the first step in optimizing its performance and preventing common printing problems. This involves recognizing the critical components that require cooling and the specific challenges that can arise from inadequate thermal management. Furthermore, proper cooling will help prevent nozzle clogging, warping, and other print defects. Without proper cooling, the extruded plastic may not solidify quickly enough, leading to a host of issues that compromise print quality.
The Importance of Cooling in 3D Printing
Cooling plays a vital role in the 3D printing process. It directly affects the ability of the printer to create accurate and high-quality models. As the heated plastic is extruded onto the print bed, it needs to cool down quickly and evenly to maintain its shape and dimensions. Without adequate cooling, the plastic may sag, warp, or deform, leading to poor print quality and failed prints. The cooling process allows the layers of plastic to solidify and bond together properly, ensuring the structural integrity of the final product. Moreover, proper cooling helps to prevent nozzle clogging, which can be a significant issue with 3D printers. When the hot end is not cooled efficiently, the filament can heat up prematurely and soften or melt inside the nozzle, causing a blockage that disrupts the printing process. Therefore, it is imperative to ensure that your Tevo Tarantula’s cooling system is functioning optimally for consistent and successful prints.
Common Cooling Problems in Tevo Tarantula

The Tevo Tarantula, despite its many strengths, can suffer from several cooling-related issues that can impede print quality. One common problem is inadequate cooling of the hot end. If the hot end fan isn’t providing sufficient airflow, the plastic filament can soften or melt prematurely, causing nozzle clogs and inconsistent extrusion. Another issue is poor part cooling, which can lead to warping, especially in parts with large flat surfaces or sharp corners. Warping occurs when the plastic cools unevenly, causing stress and distortion. Insufficient cooling can also affect the bridging capabilities of the printer, which may result in sagging or droopy structures. Finally, the stock fan and duct on the Tevo Tarantula might not be optimally designed for efficient airflow, leading to hotspots and uneven cooling. Recognizing and addressing these common cooling issues is crucial for improving print quality and achieving the best results with your Tevo Tarantula.
Top 5 Cooling Fan Upgrades for Tevo Tarantula
Upgrading the cooling system is one of the most effective ways to enhance the performance of your Tevo Tarantula. A well-designed and efficient cooling system helps to stabilize the temperature of the hot end, prevents warping, and improves overall print quality. Here are 5 essential upgrades that can transform your 3D printing experience with the Tevo Tarantula. These upgrades are relatively easy to implement and provide a significant return on investment in terms of improved print quality, reliability, and the types of materials you can successfully print. Upgrading the cooling system not only improves the prints but also extends the lifespan of the printer by preventing overheating. Choosing the right upgrades based on your specific printing needs and budget will ensure that your Tevo Tarantula runs at peak performance, enabling you to create high-quality prints consistently.
Upgrade 1 High-Performance Fans
Replacing the stock fans with higher-performance models is a straightforward and impactful upgrade. These upgraded fans typically have a higher CFM (cubic feet per minute) rating, providing increased airflow and more effective cooling for both the hot end and the printed part. Higher airflow helps to maintain a more consistent temperature, which is especially important for materials like PLA, PETG and ABS. When selecting a new fan, consider its size, voltage, and noise level. Ensure that the replacement fan fits the existing mounting locations. PWM (Pulse Width Modulation) fans, which allow for speed control, are a good option for managing noise and adjusting the cooling performance as needed. Also, ensure the new fan’s operating voltage matches your printer’s power supply to prevent damage. Upgrading the fan can significantly reduce the occurrences of nozzle clogs and improve the overall print quality. This is one of the easiest and most cost-effective ways to boost your printer’s performance.
Benefits of Upgrading Your Fan
The benefits of upgrading your fan are numerous and directly impact the quality of your 3D prints. The primary advantage is improved print quality, with enhanced dimensional accuracy and better surface finishes. A more powerful fan prevents the hot end from overheating, reducing the risk of nozzle clogs and material degradation. This is particularly critical when printing at higher temperatures or with more demanding materials. Increased airflow also minimizes warping and helps ensure that the printed layers solidify quickly and consistently. This is very important when dealing with large prints or complex geometries. Ultimately, a better fan translates into more reliable prints, reduced failures, and the ability to print a wider range of materials. This translates to better prints, fewer failures, and the ability to tackle more complex projects.
Choosing the Right Fan Specifications
Selecting the right fan specifications is crucial for optimal cooling performance and compatibility with your Tevo Tarantula. Consider the following specifications when choosing a replacement fan. The CFM rating indicates the volume of air the fan can move per minute; higher CFM means more cooling power. Noise level is another key factor, and a balance should be struck between cooling power and noise. Fan size and mounting dimensions must match the existing fan to ensure a proper fit. Voltage should match your printer’s power supply (typically 12V or 24V) to prevent damage. Consider the fan’s type, such as a sleeve bearing, ball bearing, or hydraulic bearing, each with its own noise and lifespan characteristics. PWM support allows for adjustable speed control, which can be helpful for fine-tuning cooling performance. Balancing these factors will help you choose a fan that enhances your Tevo Tarantula’s cooling capabilities without compromising on the comfort or reliability.
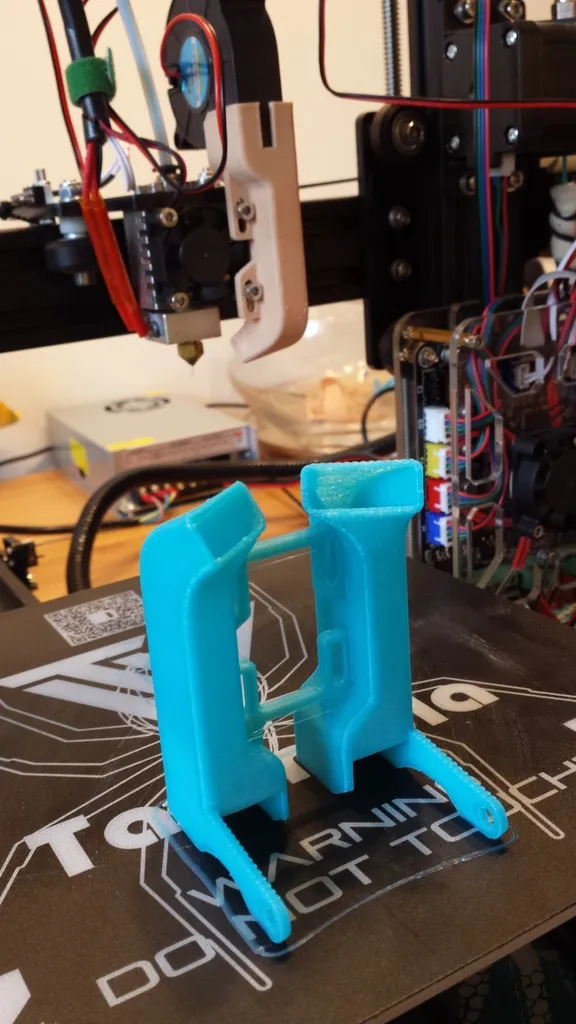
Upgrade 2 Improved Fan Duct Design
Upgrading the fan duct is another significant improvement that optimizes the airflow to the printed part. The fan duct directs the airflow from the fan onto the printed layers, ensuring that they cool quickly and evenly. A well-designed fan duct can significantly reduce warping, improve bridging capabilities, and enhance the overall quality of your prints. Often, the stock fan ducts provided with 3D printers are not optimally designed. They might direct the airflow unevenly or have poor coverage, which affects the cooling efficiency. Upgrading to a more advanced duct improves the cooling performance of your printer and helps it run more efficiently. Some designs also include additional features, such as improved nozzle visibility or support for different fan sizes, making them versatile and adaptable to various printing needs.
Types of Fan Ducts

Various fan duct designs are available, each with its own strengths and applications. Single-fan ducts are straightforward, directing the airflow from a single fan onto the print. Dual-fan ducts utilize two fans for increased airflow, which is beneficial for materials that require more aggressive cooling. Radial fan ducts use a radial fan to provide a concentrated airflow, ideal for part cooling. Adjustable ducts allow you to change the direction of the airflow, which is useful for managing different printing situations. Consider the type of filament you’re using and the specific needs of your prints when choosing a duct design. For PLA, which requires more aggressive cooling, a dual-fan or radial fan duct may be ideal. For ABS and other materials that are more sensitive to rapid cooling, a single-fan duct might suffice. Careful consideration of different designs is critical for enhancing cooling and improving print quality.
DIY Fan Duct Options
For those who enjoy tinkering, DIY fan duct options offer a cost-effective and customizable solution. You can design and 3D print your own fan ducts to meet your specific needs. Numerous designs and tutorials are available online, offering a range of options from simple designs to more complex, multi-fan configurations. When designing your own duct, consider the placement of the fan, the angle of the airflow, and the overall coverage of the print area. Optimize the design to ensure that the airflow is directed evenly and efficiently to the part. Use CAD software to create a 3D model and then print it using your 3D printer. This process allows you to experiment with different designs and tailor the cooling system to your specific printing requirements. DIY options are especially useful if you have a particular printer setup or want to test custom features such as integrated LED lighting or supports for multiple fan sizes.
Upgrade 3 Enhanced Heatsink
The heatsink is a critical component for cooling the hot end and preventing heat creep. A better heatsink improves the efficiency of heat dissipation, which can prevent nozzle clogs and improve print consistency. This is a useful upgrade for those who print frequently or who work with materials that require higher printing temperatures, such as ABS or nylon. Upgrading to a higher-quality heatsink can significantly reduce the likelihood of printing failures caused by heat creep, leading to more reliable and successful prints. Furthermore, a more effective heatsink can also improve the overall performance of the hot end, enabling faster printing speeds and more consistent extrusion. A well-designed heatsink contributes to the durability and reliability of the printer, ensuring that it operates smoothly over time.
Choosing the Right Heatsink

Choosing the right heatsink involves considering several factors to ensure that it effectively dissipates heat from your hot end. The material of the heatsink plays a critical role in its performance; aluminum and copper are common choices due to their excellent thermal conductivity. Design also matters; fins, grooves, and other design elements increase the surface area of the heatsink, allowing for more efficient heat dissipation. Size and compatibility are also important considerations. The heatsink must fit within the available space of your Tevo Tarantula and be compatible with your hot end model. Consider whether the heatsink is compatible with the existing fan or if it requires a different fan size. When choosing a heatsink, look for those specifically designed for 3D printing, as these are optimized for the thermal demands of this application. You should ensure that the chosen heatsink is from a reputable manufacturer. Proper research and choosing the right model can significantly improve print performance.
Installation of a New Heatsink
Installing a new heatsink on your Tevo Tarantula typically involves several steps. First, disconnect the power to the printer and allow the hot end to cool down completely. Then, carefully remove the existing heatsink, taking note of how it is attached. This is critical for reversing the process correctly. Clean the hot end and ensure that the surface is free of any residual thermal paste or debris. Apply a new layer of thermal paste, as this will help ensure good thermal contact between the hot end and the heatsink. Attach the new heatsink to the hot end, making sure it is securely fastened. If applicable, attach the cooling fan to the heatsink. Finally, reconnect the printer and test the new heatsink’s performance by preheating the hot end and monitoring its temperature. Regular maintenance and cleaning of the heatsink will help ensure its continued effectiveness. Following these steps carefully will ensure your new heatsink functions optimally and helps prevent heat creep, ensuring quality printing.
Upgrade 4 Upgraded Power Supply
An upgraded power supply provides a more stable and reliable power source for your Tevo Tarantula, which can improve overall performance and potentially prevent issues related to underpowered components. Upgrading the power supply is not directly related to cooling but can indirectly affect the performance of cooling fans and other components that rely on consistent power. A higher-quality power supply will ensure that your cooling fans and other components receive consistent power, allowing them to function efficiently. This is very important if you plan to add more power-hungry components to your printer, like a heated bed or additional fans. Moreover, an upgraded power supply can also improve the safety of your printer by reducing the risk of electrical issues. A good power supply can extend the life of your 3D printer.
Choosing a Suitable Power Supply

Selecting a suitable power supply requires considering both the current and future power needs of your Tevo Tarantula. Determine the total power consumption of your printer, including the heated bed, hot end, fans, and any other accessories you have installed. Choose a power supply that exceeds this demand by a margin, typically around 20% to 30%, to provide a safety buffer and ensure stable performance. Consider the voltage requirements, typically 12V or 24V, and ensure that the new power supply matches your printer’s specifications. Choose a power supply from a reputable manufacturer to ensure quality and reliability. Also, consider the form factor, which affects how easily it can be installed in your printer’s enclosure. Make sure the new power supply meets safety standards and is properly rated to prevent electrical issues. Finally, read reviews and consult online forums to learn about the experiences of other users before making your decision.
Safety Precautions for Power Supply Upgrades
Upgrading your power supply involves working with electrical components, so safety should always be your top priority. Disconnect the printer from the power source before starting any work on the power supply. Ensure that the new power supply matches your printer’s voltage and current requirements. When connecting the wires, make sure that all connections are secure and properly insulated. Follow the manufacturer’s instructions to install the power supply correctly. If you’re not comfortable working with electrical components, seek assistance from someone with experience. Verify that the power supply is properly grounded to minimize the risk of electric shock. Never operate a printer with a damaged or faulty power supply. Following these safety precautions will help ensure a safe and successful power supply upgrade.
Upgrade 5 Filament Cooling Fan
A filament cooling fan directs airflow onto the extruded filament, cooling it quickly and allowing it to solidify into the desired shape. This is essential for materials like PLA, which require rapid cooling to prevent warping and maintain dimensional accuracy. While the fan ducts and heatsinks mentioned earlier are useful, a dedicated filament cooling fan provides a more focused and effective cooling solution. This upgrade is particularly beneficial when printing overhangs, bridges, and other complex geometries. By improving the cooling, you can reduce warping, improve print quality, and expand the range of materials your Tevo Tarantula can handle. Furthermore, this can also improve the surface finish and prevent stringing. The benefits are clear, making it a valuable upgrade for anyone looking to optimize their printer’s performance.
Benefits of a Filament Cooling Fan

The addition of a filament cooling fan delivers a range of benefits that significantly improve print quality. First, improved dimensional accuracy and reduced warping are major advantages. By quickly solidifying the extruded plastic, the fan helps to maintain the designed shape and prevent distortions. Second, filament cooling allows you to print sharper details, especially on small features and complex geometries, which can be difficult to achieve without adequate cooling. Additionally, this also enhances the ability to create overhangs and bridges, which are vital for many designs. By minimizing sagging and improving the overall structural integrity, you will see significant improvements in print success. Moreover, you can print a wider range of materials, as the controlled cooling helps to accommodate a variety of filament types. Finally, a filament cooling fan can improve the surface finish of your prints, making them smoother and more visually appealing.
Installation and Setup
Installing a filament cooling fan typically involves a few key steps. Begin by mounting the fan to the printer, usually near the nozzle or hot end. Ensure that the fan is positioned to direct airflow towards the extruded filament. Many designs use fan ducts to direct the air effectively. Next, connect the fan’s power to the printer’s control board, ensuring that the voltage matches the fan’s specifications. Test the cooling fan by preheating the hot end and extruding some filament to confirm that the fan is cooling the filament effectively. Some filament cooling fan designs may need to be calibrated based on print speed and temperature. Also, be sure to adjust the fan speed settings in your slicer software. Finally, adjust the fan speed settings in your slicer software to optimize the cooling for different filaments. Experiment with different fan speeds to find the best settings for your specific printing needs. Regular maintenance ensures that your filament cooling fan keeps performing optimally.
Troubleshooting Cooling Issues on Tevo Tarantula
Even with the best upgrades, you might encounter cooling-related issues. These problems can often be resolved with some troubleshooting. By learning how to identify and resolve common issues, you will make the most of your upgrades. This will ensure that your prints remain high quality and that your printer operates reliably over time. Regular troubleshooting allows you to quickly identify and address problems, keeping your printer in top condition. This proactive approach extends the lifespan of your printer and ensures it consistently delivers high-quality prints.
Nozzle Clogging and Filament Issues
Nozzle clogs and filament issues are common problems that can arise from inadequate cooling. If the hot end isn’t cooled sufficiently, the filament may soften or melt prematurely inside the nozzle, causing a blockage. This can disrupt the printing process, leading to print failures. When troubleshooting these issues, inspect the hot end fan and ensure it’s functioning correctly. Clean the nozzle thoroughly and try different types of filament. Make sure that the hot end temperature is correctly calibrated for the filament you are using. If the issue persists, consider upgrading the hot end fan, the heatsink, or the fan duct. Also, check for any other mechanical or material issues that might be contributing to the problem. Regularly monitoring your printer for any signs of filament-related problems is key to preventing clogs and ensuring that your prints remain perfect.
Preventive Maintenance and Optimization
Preventive maintenance and optimization are essential for maintaining a well-functioning cooling system and ensuring high-quality prints. Regularly check the cooling fans for dust, debris, and proper operation. Cleaning the fans can prevent them from overheating. Inspect and clean the heatsink, removing any accumulated filament residue. You can enhance cooling performance. Regularly review the fan duct for proper alignment and any signs of damage or wear. Make sure the nozzle temperature is always set correctly to the type of filament. Keep the print environment at a consistent temperature to avoid any fluctuations that can affect print quality. Finally, consult online resources or forums to stay informed about best practices and updates. Preventive maintenance saves you time and money in the long run, maintaining your printer’s excellent performance.