The Tevo Tarantula is a popular 3D printer, known for its affordability and ease of use. However, to unlock its full potential, upgrading the firmware is essential. Firmware acts as the brain of your 3D printer, controlling all of its functions, from the movement of the print head to the temperature of the heated bed. In this article, we’ll explore the top 5 firmware upgrades for your Tevo Tarantula, helping you enhance its performance, add new features, and ultimately improve your 3D printing experience. Choosing the right firmware can dramatically impact print quality, speed, and the overall user experience, so understanding your options is crucial for any Tevo Tarantula owner.
Top 5 Firmware Upgrades for Tevo Tarantula
Selecting the best firmware is a crucial decision that directly affects the functionality and efficiency of your Tevo Tarantula. The choice of firmware can significantly influence print quality, the speed at which prints are completed, and the integration of features that enhance the 3D printing experience. Firmware is not just about basic functionality; it’s about opening the door to advanced capabilities that can turn a good printer into a great one. Let’s dive into the top 5 firmware options available to transform your printing experience.
Why Upgrade Your Tevo Tarantula Firmware?
Upgrading the firmware on your Tevo Tarantula is like giving your printer a significant performance boost. The original firmware, while functional, often lacks the latest features, optimizations, and bug fixes that newer versions offer. Upgrading can lead to better print quality, more accurate movements, and the ability to utilize advanced features like auto bed leveling. It can also improve the printer’s stability and reduce common issues like thermal runaway. Regularly updating the firmware ensures your printer remains up-to-date with the latest developments in 3D printing technology, offering a smoother and more reliable printing experience. This not only improves your prints but also extends the lifespan of your printer.
Benefits of Updated Firmware

The benefits of updating the firmware are numerous and impactful. Enhanced print quality is one of the most noticeable improvements, with features like better temperature control and more precise movements contributing to superior results. Increased print speed is another significant advantage, with updated firmware often containing optimizations that allow for faster printing without sacrificing quality. Furthermore, modern firmware often introduces advanced features such as improved support for different materials, more user-friendly interfaces, and the ability to integrate with advanced printing technologies. The implementation of updated safety features, such as thermal runaway protection, adds an extra layer of security, ensuring your printer operates safely and efficiently.
Potential Issues with Old Firmware
Using outdated firmware can lead to various issues that can detract from your 3D printing experience. Older versions often lack critical bug fixes, which can cause print failures, inaccurate movements, and inconsistent print quality. Security vulnerabilities can also exist in older firmware, potentially leading to printer malfunctions or even safety hazards. Without the latest updates, you’re missing out on performance improvements, new features, and optimizations for different printing materials. Furthermore, older firmware may not support the latest hardware upgrades or new printing techniques, limiting the capabilities of your Tevo Tarantula. In essence, running old firmware can mean a less reliable, less efficient, and potentially less safe printing experience.
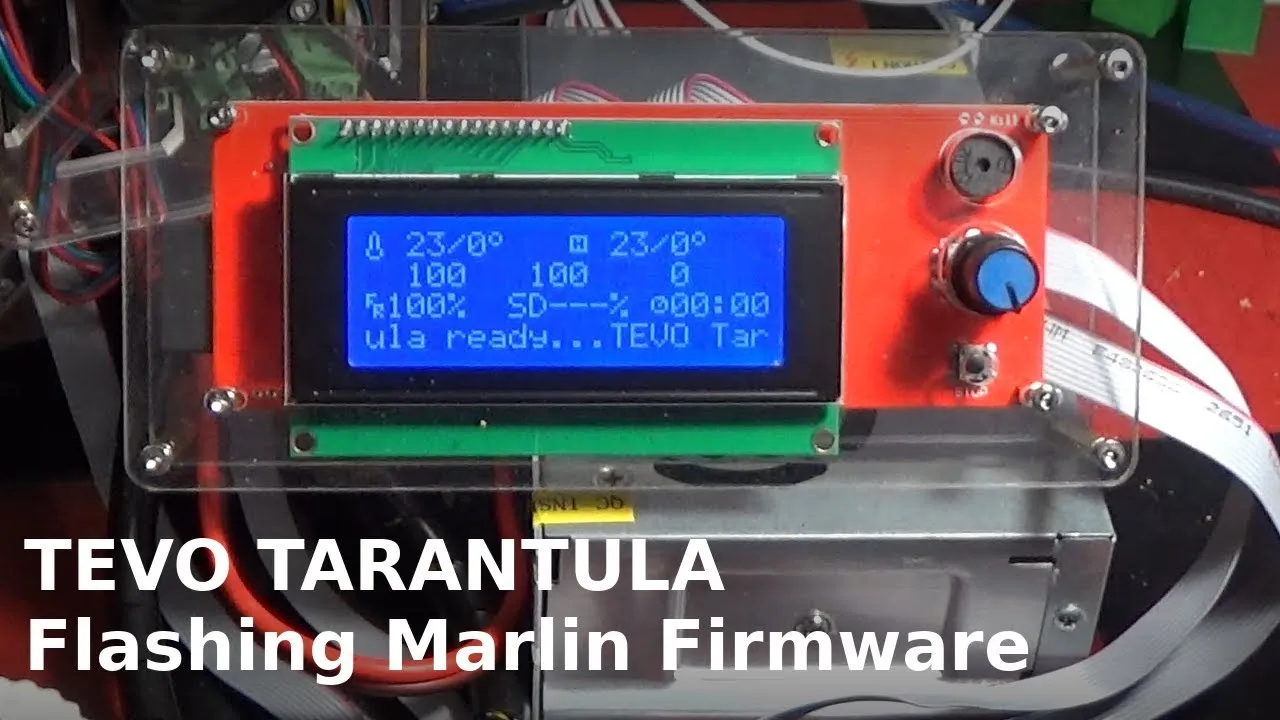
Top Firmware Option 1 Marlin
Marlin is one of the most popular and widely used open-source firmware options for 3D printers, including the Tevo Tarantula. Its widespread adoption means there is extensive community support, countless tutorials, and readily available pre-compiled firmware versions specifically tailored for the Tevo Tarantula. Marlin’s versatility allows for extensive customization, enabling users to fine-tune almost every aspect of their printer’s behavior. This includes adjusting settings related to temperature control, movement, and print quality. The firmware is continuously updated by a large community of developers, ensuring that new features and improvements are regularly added, providing a continuously evolving and improving experience for users.
Features of Marlin Firmware

Marlin firmware is packed with features designed to enhance the 3D printing experience. Advanced features include support for auto bed leveling, which greatly simplifies the process of preparing the print bed for printing, ensuring optimal first-layer adhesion. Temperature control is highly refined, offering precise management of the hot end and bed temperatures, crucial for achieving consistent and high-quality prints. Marlin also supports various display types, allowing for a user-friendly interface on your printer’s control panel. It also offers extensive customization options for movement settings, such as acceleration and jerk control, which can improve print speed and reduce vibrations. The continuous development ensures that it remains at the forefront of 3D printing technology.
How to Install Marlin Firmware
Installing Marlin firmware on your Tevo Tarantula requires a few straightforward steps. First, you’ll need to download the Marlin firmware from a reliable source, such as the official Marlin website or a trusted community repository. Next, you will need to install the Arduino IDE on your computer, as it is the primary tool used to compile and upload the firmware. After installing the Arduino IDE, you need to install the necessary libraries for your specific board. Open the Marlin configuration file within the Arduino IDE, configure the settings appropriate for the Tevo Tarantula’s hardware. Finally, connect your printer to your computer via USB, select the correct board and port within the Arduino IDE, and upload the compiled firmware to your printer. Remember to back up your original firmware before flashing to ensure you can revert if necessary.
Setting Up Marlin for Your Tevo Tarantula
Configuring Marlin for the Tevo Tarantula involves adjusting the firmware settings to match the printer’s hardware specifications. This process starts with selecting the correct board type in the configuration.h file, specifically identifying the board used in your Tevo Tarantula. Next, you’ll need to configure the thermistor settings for your hot end and heated bed to ensure accurate temperature readings. Other important configurations include setting the steps per millimeter for your X, Y, and Z axes to ensure accurate movements, and calibrating the endstop positions to define the printer’s build volume. If your Tevo Tarantula has features like auto bed leveling, you must enable and configure the relevant settings. Proper configuration is crucial for ensuring the printer operates safely and produces high-quality prints. Careful attention to detail during this stage will guarantee optimal performance.
Top Firmware Option 2 Repetier

Repetier firmware is another popular open-source option for 3D printers, providing a robust alternative to Marlin with its own unique set of features and strengths. Known for its user-friendly interface and extensive configuration options, Repetier is a strong contender for users seeking a customizable printing experience. The firmware includes features that offer advanced control over your printer’s performance and a comprehensive set of settings that can be adjusted to optimize print quality and speed. Repetier firmware also boasts strong community support, with numerous resources and tutorials available to help users with installation and troubleshooting. Its focus on ease of use combined with robust capabilities makes it a strong contender for users of the Tevo Tarantula. (repetier-firmware-interface)
Features of Repetier Firmware
Repetier firmware offers a variety of features that set it apart. These include support for multiple extruders, making it suitable for more complex prints that require multiple materials or colors. The firmware provides advanced support for features like auto bed leveling, which ensures a perfect first layer every time. It incorporates a user-friendly interface and offers extensive customization options. Repetier also features built-in support for SD card printing, allowing you to print directly from the printer without needing a connected computer. Its integrated web interface enables remote control and monitoring of your prints. Support for mesh bed leveling is another notable feature, providing an effective way to compensate for bed irregularities and further improve print quality.
How to Install Repetier Firmware
Installing Repetier firmware on your Tevo Tarantula involves a process similar to that of Marlin, but with some key differences. You’ll first need to download the Repetier firmware, along with Repetier Host software. Download the correct version for your Tevo Tarantula. Next, connect your printer to your computer using a USB cable and install the necessary drivers for communication. The Repetier Host software is used to upload the firmware to your printer. You will need to configure the Repetier Host settings to match your printer’s specifications. After the firmware is uploaded, you can start configuring the settings in Repetier Host, to control printer behavior. Careful attention to the installation process and correct configuration of the Repetier Host software will ensure a successful upgrade.
Configuring Repetier for Tevo Tarantula

Configuring Repetier firmware for the Tevo Tarantula involves fine-tuning settings in the Repetier Host software to match the printer’s hardware. This begins with selecting the correct printer profile within the Repetier Host. This will include setting the build volume, the number of extruders, and the type of heated bed. You will also need to configure the printer’s communication settings, such as the baud rate, to ensure smooth data transfer. The next step involves calibrating the printer’s axes. Accurate calibration is essential for ensuring the correct print dimensions. You will also configure the temperature settings for the hot end and bed. Finally, you can set the settings related to bed leveling and other advanced features. Properly configured Repetier firmware ensures that your Tevo Tarantula operates with precision and consistency.
Top Firmware Option 3 Smoothieware
Smoothieware is a high-performance, open-source firmware that is known for its advanced capabilities and robust features, making it a favorite among 3D printing enthusiasts looking to push the boundaries of their machines. This firmware is specifically designed to provide precise motion control and supports various advanced features, such as delta kinematics and dual extrusion. The firmware is highly adaptable, allowing users to customize the settings and functionality of their 3D printers to a greater degree than many other firmware options. Smoothieware is favored for its ability to offer excellent print quality, especially when dealing with complex geometries. (smoothieware-configuration)
Smoothieware Features and Advantages
Smoothieware stands out because of its unique features and advantages. The firmware uses a 32-bit architecture, which allows for faster processing and smoother motion control. Its design emphasizes precision and control over the stepper motors, which results in superior print quality and reduced vibrations. Smoothieware includes advanced features such as support for delta printers, which are known for their speed and accuracy. It offers advanced motion planning algorithms, like optimized acceleration and jerk control, that can improve printing speed and reduce artifacts. The firmware allows for easy configuration through a simple text file, making it accessible to users of all skill levels. It offers a highly adaptable platform, that is well suited for experiments. Its superior performance and robust capabilities make it a valuable option for experienced users.
Installing Smoothieware on Your Printer

Installing Smoothieware on your Tevo Tarantula involves a few key steps, including preparing the necessary components, such as the firmware file and an SD card. Download the latest version of Smoothieware. To install the firmware, you must copy the firmware file to the SD card, formatting the card correctly to ensure compatibility. Next, insert the SD card into your printer’s control board. Power on the Tevo Tarantula; the firmware will then be automatically loaded and installed. This process replaces the existing firmware with Smoothieware. The installation process is simple and does not require any special hardware beyond an SD card. You may need to configure your printer settings manually, using the configuration file. Remember to back up your original firmware to allow for a rollback, if required.
Customizing Smoothieware for Tevo Tarantula
Customizing Smoothieware for the Tevo Tarantula is done primarily through the configuration file, which is a text file located on the SD card. This configuration file allows users to adjust various settings to match their printer’s hardware specifications and preferences. The settings that can be modified include those for the printer’s axes, like the steps per millimeter and the direction of the motors. Temperature control settings for the hot end and bed are also configured here, along with options for features like bed leveling. You can also configure the serial communication settings for the printer and the LCD screen settings to customize the user interface. Proper customization of the configuration file ensures that the firmware operates correctly, optimizing print quality. Users are encouraged to adjust these settings gradually, and experiment with different parameters to optimize for their individual printers and needs.
Top Firmware Option 4 Klipper
Klipper is a unique and powerful firmware solution that stands out because it uses a distributed architecture. This means it splits the processing tasks between the printer’s control board and a more powerful host computer, such as a Raspberry Pi. This setup allows Klipper to achieve high printing speeds and better print quality. The firmware is known for its precise motion control and its capacity to support advanced features. Klipper firmware is an excellent choice for anyone looking to get the best performance out of their Tevo Tarantula. With its focus on speed and print quality, Klipper has become a popular choice among 3D printing enthusiasts seeking the best results. (klipper-3d-printer-control)
Klipper’s Performance Enhancements

Klipper delivers significant performance enhancements, particularly in print speed and quality. Its use of a host computer for processing allows it to handle complex calculations faster. The firmware is capable of supporting higher acceleration and jerk settings, which can lead to faster printing speeds without loss of quality. Features like input shaping can reduce ringing and other print artifacts, which improves the surface finish. Klipper also offers advanced features such as pressure advance, which controls the flow of filament from the nozzle. These enhancements can improve print quality, making details clearer and finer. Klipper enables users to push the limits of their 3D printers.
Setting Up Klipper for the Tevo Tarantula
Setting up Klipper for the Tevo Tarantula involves several steps, beginning with installing the necessary software on a host computer, like a Raspberry Pi. You’ll need to install the Klipper firmware on the printer’s control board. You must also install and configure the printer’s hardware in the printer.cfg file. You need to specify the parameters for the axes and endstops, as well as the settings for your hot end, bed, and other components. It’s crucial to configure the communication settings between the printer’s control board and the host computer. Calibrating the printer, setting up bed leveling, and adjusting the input shaping settings are all part of the setup process. This approach can be challenging for beginners, but the benefits of using Klipper make it a worthwhile endeavor.
Optimizing Klipper Configuration
Optimizing the Klipper configuration involves fine-tuning settings in the printer.cfg file to achieve the best possible print quality and performance. Adjusting the acceleration and jerk settings can help you to strike a balance between print speed and quality. Calibrating the pressure advance setting is essential for improving the accuracy of extrusion, which can result in sharper details. You may also adjust the input shaping settings to reduce artifacts. Calibration is necessary for measuring and accounting for any small errors. Regularly monitoring your prints and making adjustments will ensure that you get the best performance from your printer. The ongoing optimization process allows you to continually improve print quality.
Top Firmware Option 5 Custom Firmware Builds

Custom firmware builds offer another avenue for enhancing your Tevo Tarantula. These are customized versions of standard firmware options, often created by experienced users. Custom builds can include modified configurations, new features, and performance optimizations tailored to the Tevo Tarantula. They represent the cutting edge of community-driven innovation in 3D printing. This allows users to take advantage of specialized enhancements without needing to build from scratch. They can also solve specific problems or introduce new capabilities. These builds often come with detailed instructions, which simplifies installation and use. Users interested in exploring advanced capabilities and tuning their printers can benefit from these options. (custom-firmware-community)
Finding and Using Community-Made Firmware
Finding and using community-made firmware for your Tevo Tarantula involves a few steps. Begin by exploring online forums and communities dedicated to 3D printing. These platforms are often the best places to find custom firmware builds. Popular options include GitHub repositories, where developers often share their work. Examine the build instructions and configuration files provided by the developer. Download the firmware files and any necessary configuration files. The next step involves installing the firmware on your Tevo Tarantula. You may also need to modify the configuration file to match the specifics of your printer. Thoroughly test the new firmware to ensure that everything functions correctly. By staying connected to the 3D printing community, you can access the latest enhancements.
Risks and Rewards of Custom Firmware
Using custom firmware presents both risks and rewards. One of the main benefits is the ability to access the latest features and performance improvements. Many custom builds come with optimizations that improve print quality and speed. There can be a risk involved, as custom firmware might not be as thoroughly tested as official releases. There is a potential for errors or incompatibility issues that can result in printer malfunctions or damage. You might void your printer’s warranty. You should always back up your original firmware before installing a custom build. Carefully assess the risks and rewards before installing any custom firmware. Only use custom builds from trusted sources to mitigate the risks and maximize the benefits.
Upgrading the firmware on your Tevo Tarantula is a rewarding process. There are several great firmware options available, and each of them will help you to enhance your printer’s performance, add new features, and improve your overall 3D printing experience. Whether you choose Marlin, Repetier, Smoothieware, Klipper, or a custom build, you can transform your printer. By carefully researching and understanding the features of each option, you can select the firmware that best fits your needs and printing goals. With the right firmware, your Tevo Tarantula will perform to its full potential, delivering high-quality prints and enhancing your 3D printing experience. Embrace the opportunity to experiment and customize to find the perfect configuration for your needs. (tevo-tarantula-printing)