Tevo Tarantula Print Quality Improvement
The Tevo Tarantula is a popular and affordable 3D printer, known for its ease of use and large build volume. However, achieving high-quality prints requires attention to detail and understanding the factors that influence print quality. Many users seek ways to enhance their Tevo Tarantula’s performance and produce more accurate, detailed, and visually appealing prints. This guide will explore five key areas where you can make adjustments to significantly improve the quality of your Tevo Tarantula prints. By focusing on bed leveling, temperature settings, calibration, belt tension, and firmware, you can unlock the full potential of your 3D printer and achieve outstanding results. Let’s delve into these essential techniques to elevate your 3D printing experience and boost print quality.
Leveling the Print Bed
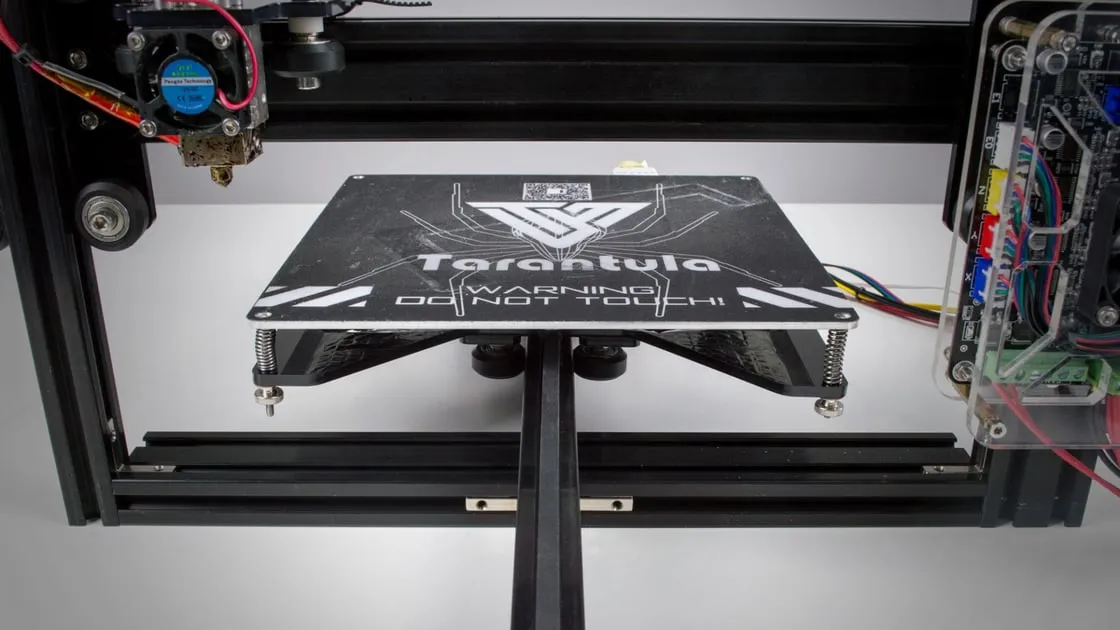
One of the most critical steps for achieving excellent print quality is ensuring a properly leveled print bed. A level bed ensures that the first layer of your print adheres correctly, which is the foundation for the entire print. If the bed is not level, the nozzle may be too close to or too far from the bed in different areas, leading to poor adhesion, warping, and other print defects. The Tevo Tarantula typically uses manual bed leveling, which requires you to adjust the bed height using the leveling screws located at each corner. Regularly checking and adjusting the bed level is crucial, especially before each print, to compensate for any movement or changes in the printer setup. Proper bed leveling is the cornerstone of successful 3D printing, setting the stage for accurate and high-quality prints.
Bed Leveling Steps

To level the print bed, start by preheating your printer to the recommended temperature for your filament. Then, use a piece of paper (the ‘paper test’) to check the distance between the nozzle and the bed at each corner. Adjust the bed leveling screws until the nozzle lightly grips the paper as you move it. Repeat this process, going around the bed multiple times, until the nozzle has the same distance from the bed at all points. You may also consider using a bed leveling probe for more precise and automated leveling. After leveling, print a test square or a small first-layer print to verify that the first layer adheres smoothly and evenly across the entire bed. Fine-tune the bed level as needed based on the results of your test print. Consistent bed leveling is an ongoing process, not a one-time task, and is essential for optimal print quality and successful 3D printing projects.
Adjusting Z-Offset
The Z-offset setting determines the distance between the nozzle and the print bed when the printer is at its Z-height zero position. Correctly setting the Z-offset is just as crucial as bed leveling, as it dictates the first layer’s adhesion and quality. If the Z-offset is too high, the filament won’t stick to the bed. If it’s too low, the nozzle will scrape against the bed, potentially damaging the bed or nozzle and causing print defects. To adjust the Z-offset, you typically use the printer’s control panel to fine-tune the distance during the first layer. Start with a slightly positive offset and gradually decrease it until the filament starts to adhere properly to the bed. Observe the first layer carefully, and look for a smooth, consistent layer with no gaps or excessive squishing. The ideal Z-offset varies depending on the filament and bed surface, so you might need to adjust it for different materials. Proper Z-offset calibration is key to achieve the correct first layer, which sets the foundation for high-quality 3D prints.
Nozzle Temperature Optimization
The printing temperature significantly impacts print quality. The correct temperature setting is critical for filament to melt properly and adhere correctly to the bed and subsequent layers. Printing at the wrong temperature can cause various problems, such as under-extrusion, stringing, warping, and poor layer adhesion. The ideal nozzle temperature depends on the filament type, brand, and even the color. As a starting point, consult the filament manufacturer’s recommendations for the temperature range. However, it is always best to do some testing to find the optimal temperature for the specific filament you are using, as the recommended temperature is often a range, not a fixed value. Precise temperature control ensures proper filament flow, layer adhesion, and overall print quality. Finding the right temperature might require a bit of experimentation, but the result is significantly better prints.
Finding the Right Temperature for your Filament

To find the optimal temperature, start by printing a temperature tower, which is a test object designed to evaluate how the filament behaves at different temperatures. The temperature tower gradually decreases the nozzle temperature throughout the print. By observing the print quality at each temperature segment, you can identify the optimal temperature range for your filament. Look for a section of the tower with good layer adhesion, no stringing, and minimal defects. Once you have determined the temperature range, fine-tune the temperature setting on your Tevo Tarantula for your specific prints. If you notice issues such as under-extrusion or stringing, you can adjust the temperature accordingly. Remember to document your findings and save them, so you don’t have to go through this process every time you use a new filament. Temperature is a crucial factor and using a temperature tower will help ensure that your prints come out perfect.
Calibrating Extruder Settings
The extruder is responsible for pushing the filament through the nozzle, and calibrating the extruder settings ensures the correct amount of filament is extruded. Improper extruder calibration can result in under-extrusion (not enough filament) or over-extrusion (too much filament), both of which will negatively affect print quality. Under-extrusion can cause gaps between layers and weak parts, while over-extrusion can lead to blobs, oozing, and dimensional inaccuracies. Proper calibration involves calculating and setting the correct steps per millimeter (esteps/mm) for your extruder. This setting determines how much the extruder motor turns to feed a specific length of filament. Accurate esteps/mm is essential for the printer to extrude the precise amount of filament required for each layer of the print. Calibrating the extruder might require some effort, but is important for improving print quality.
Steps for Extruder Calibration
To calibrate your extruder, start by marking the filament at a specific distance from the extruder. Heat the nozzle to the recommended temperature for your filament. Then, command the extruder to push a specific length of filament (e.g., 100mm). Measure the actual amount of filament extruded, and calculate the difference between the commanded and actual values. Use this difference to calculate the new esteps/mm setting using a formula. Input this new setting into your printer’s firmware or slicer software, and test again to confirm the accuracy. You might need to repeat this process a few times to fine-tune the setting. Correct extruder calibration allows you to control the amount of filament extruded with great precision, preventing both under-extrusion and over-extrusion. This is essential for ensuring the dimensional accuracy of your prints, improved layer adhesion, and achieving a clean, high-quality surface finish.
Belt Tension Adjustments

The belts on your Tevo Tarantula control the movement of the print head and the print bed. Properly tensioned belts are crucial for precise movements and accurate print dimensions. Loose belts can cause layer shifting, ringing, and other artifacts that negatively affect print quality. When the belts are too loose, the print head or bed can lag behind, leading to print inaccuracies. On the other hand, excessively tight belts can put undue stress on the motors and other components, potentially leading to premature wear or mechanical failures. Maintaining the correct belt tension is essential for achieving consistent, high-quality prints. Belt adjustments are often overlooked, but they are a significant element in maintaining print quality.
Tightening X and Y Axis Belts
To adjust the belt tension, first, locate the belt tensioning mechanisms on the X and Y axes of your Tevo Tarantula. These mechanisms usually involve screws or knobs that allow you to adjust the tension. Tighten the belts until they are snug, but not overly tight. A good rule of thumb is that you should be able to pluck the belts like a guitar string and hear a clear, distinct tone. The belts should not feel slack, and there should be minimal play when you move the print head and the bed manually. After adjusting the belts, run some test prints and observe the print quality. If you still see layer shifting or other issues, fine-tune the belt tension further. Regularly check and adjust the belt tension as part of your printer maintenance routine, especially after extended use or if you notice any changes in print quality. Good belt tension is a key factor in reducing print defects and improving the overall accuracy and quality of your prints.
Firmware Updates
Keeping your Tevo Tarantula’s firmware up-to-date is an often-overlooked aspect of print quality optimization. Firmware is the software that controls the printer’s hardware, and updates can improve the printer’s performance, stability, and print quality. Newer firmware versions often include bug fixes, performance improvements, and new features that can enhance your printing experience. Some firmware updates might also introduce optimized motion control algorithms, which can improve the accuracy and smoothness of the print movements. Upgrading your firmware can provide new features, and will also resolve errors and bugs that could be affecting print quality. Firmware updates can be a simple but effective way to improve print quality.
Benefits of Firmware Updates

To update your firmware, you will typically need to download the latest version from the manufacturer or a reputable source. Then, you will flash the new firmware onto your printer’s control board. The exact process will vary depending on the firmware and the printer model, so consult the documentation or online guides for specific instructions. Before updating, always make a backup of your current firmware in case you need to revert. After the update, carefully check the printer’s settings and recalibrate anything necessary, such as the esteps/mm or Z-offset. Firmware updates can resolve printing problems and introduce new features, potentially improving your print quality. Always keep up-to-date to ensure your printer operates with the best possible performance and stability. This is one of the easier ways to improve your print quality.
Conclusion
Improving the print quality of your Tevo Tarantula is an iterative process that involves understanding your printer’s components and making adjustments to optimize its performance. By focusing on bed leveling, temperature control, extruder calibration, belt tension, and firmware updates, you can significantly enhance your print quality. Remember that the ideal settings and techniques might vary depending on the filament type, environment, and the specific project. Experimenting, documenting your findings, and continuously refining your settings will help you unlock the full potential of your Tevo Tarantula. With patience and attention to detail, you can achieve outstanding print results and take your 3D printing projects to the next level. Good luck, and happy printing!
